Features & Scenarios
This guide explains how XPressRT organises tests using features, scenarios, and scenario outlines, and how to create and edit them in the UI.
Core Concepts
Feature
A Feature maps directly to a single Gherkin .feature file. It groups together a set of related test cases (scenarios) that collectively verify one functional area of the device under test.
Every feature has:
| Property | Description |
|---|---|
| Name | A short identifier used as the file name (e.g. Good_cases) |
| Description | Optional free-text explanation of what the feature covers |
| Tags | One or more @tag labels used for filtering and suite assignment |
| Background Steps | Optional steps that run before every scenario in the feature |
Scenario
A Scenario is a single, linear test case. It runs once when executed. Each scenario is composed of ordered steps written in Gherkin syntax (Given, When, Then, And, But).
Scenario Outline
A Scenario Outline is a parameterised scenario. Instead of hard-coded values in the step text, it uses placeholder tokens wrapped in < > (e.g. <voltage>). An Examples table (shown in XPressRT as the Parameter Values table) provides one or more rows of values. The scenario is executed once per row — making it ideal for data-driven testing.
The Test-Editor View
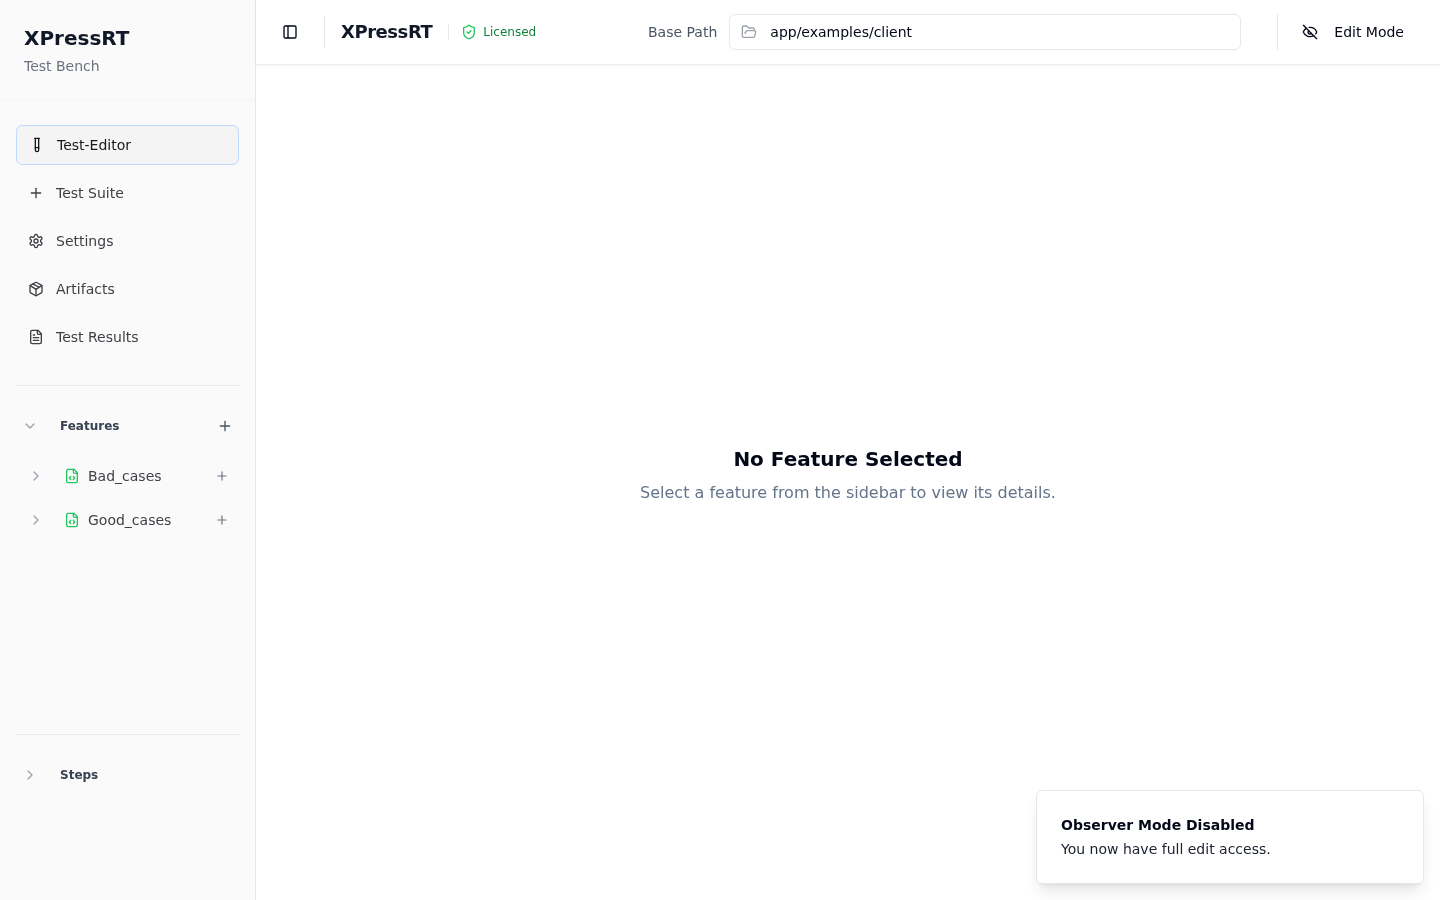
Select Test-Editor from the left sidebar. The left panel shows two collapsible sections:
- Features — all feature files in the current base path
- Steps — the registered step-definition library
Creating a Feature
- Switch to Edit Mode.
- Click the + icon next to the Features heading in the sidebar.
- Fill in the Add Feature dialog:
| Field | Required | Notes |
|---|---|---|
| Name | Yes | Used as the .feature file name. Spaces are not allowed — use underscores. |
| Description | No | Free text shown inside the feature file |
| Tags | No | Enter a tag name and click + to add. Tags are automatically prefixed with @. |
| Background Steps | No | Steps that run before every scenario in this feature |
- Click Create Feature.
The new feature appears in the sidebar immediately and a corresponding .feature file is written to disk.
Creating a Scenario
- In the sidebar, locate the feature you want to add a scenario to.
- Click the + icon that appears to the right of the feature name when Edit Mode is active.
- In the Add Scenario dialog choose the scenario type:
| Type | When to use |
|---|---|
| Scenario | A single-run test with fixed values |
| Scenario Outline | A parameterised test that runs once per data row |
- Give the scenario a name and click Create.
Editing a Scenario
Click any scenario name in the sidebar to open the scenario editor.
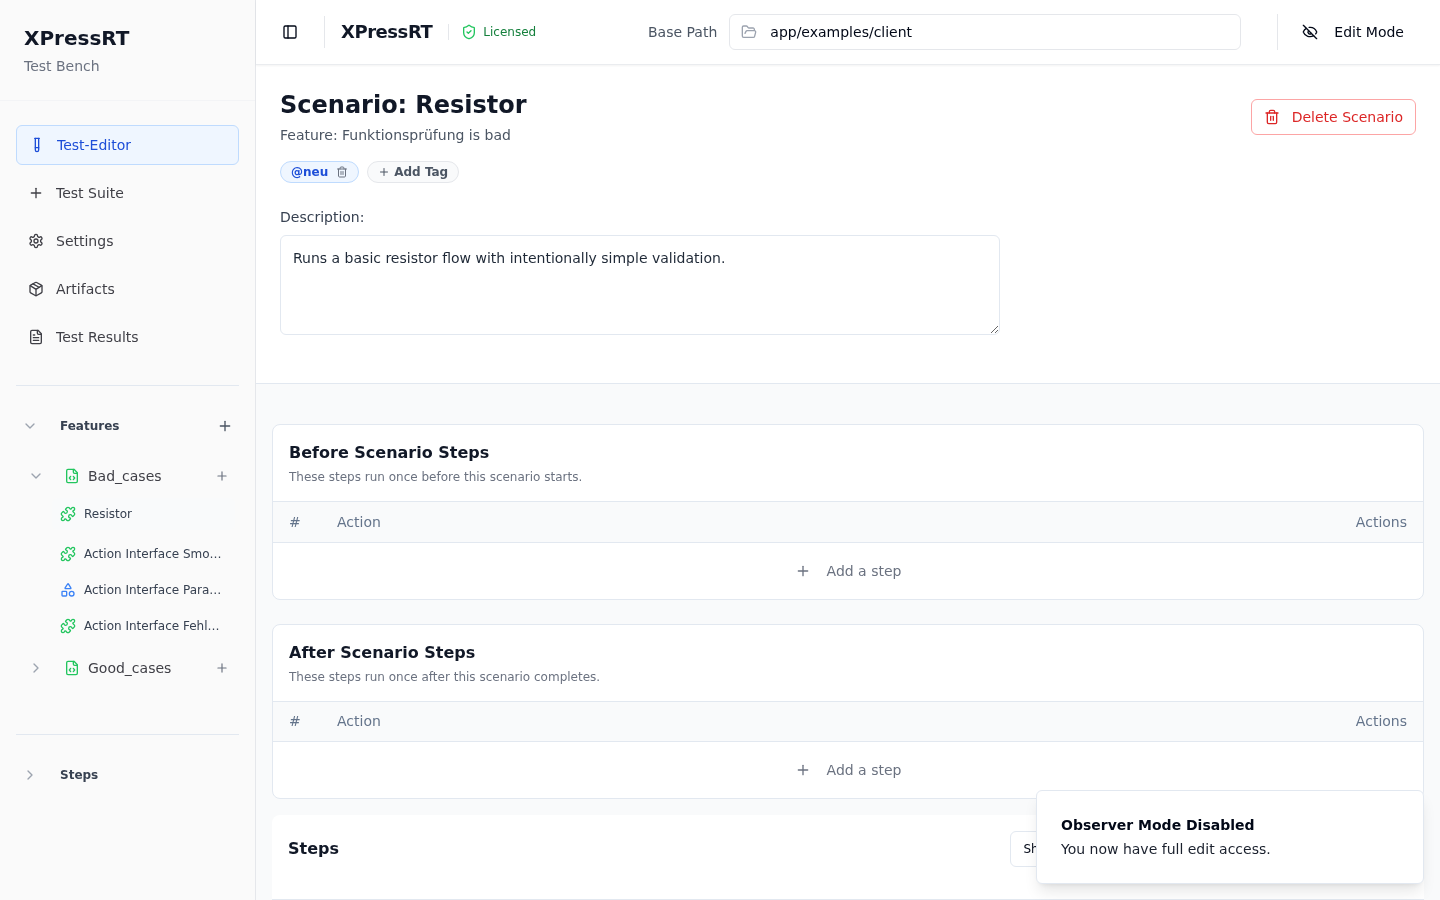
Scenario Header
At the top of the editor you can see and modify:
- Type badge —
Scenario:orScenario Outline:(not editable; set at creation time) - Name — click the heading text to edit it inline
- Feature — the parent feature name (read-only)
- Tags — click an existing tag to remove it, or click + Add Tag to add a new one
- Description — free-text field describing the purpose of the scenario
Before / After Scenario Steps
These optional hooks let you define steps that run automatically before or after the main scenario body.
Use them for common setup (e.g. powering on the device) or teardown (e.g. safe shutdown) that applies only to this specific scenario. Background steps in the parent feature serve a similar purpose but apply to all scenarios.
Steps
The Steps table is the core of the scenario. Each row represents one Gherkin step.
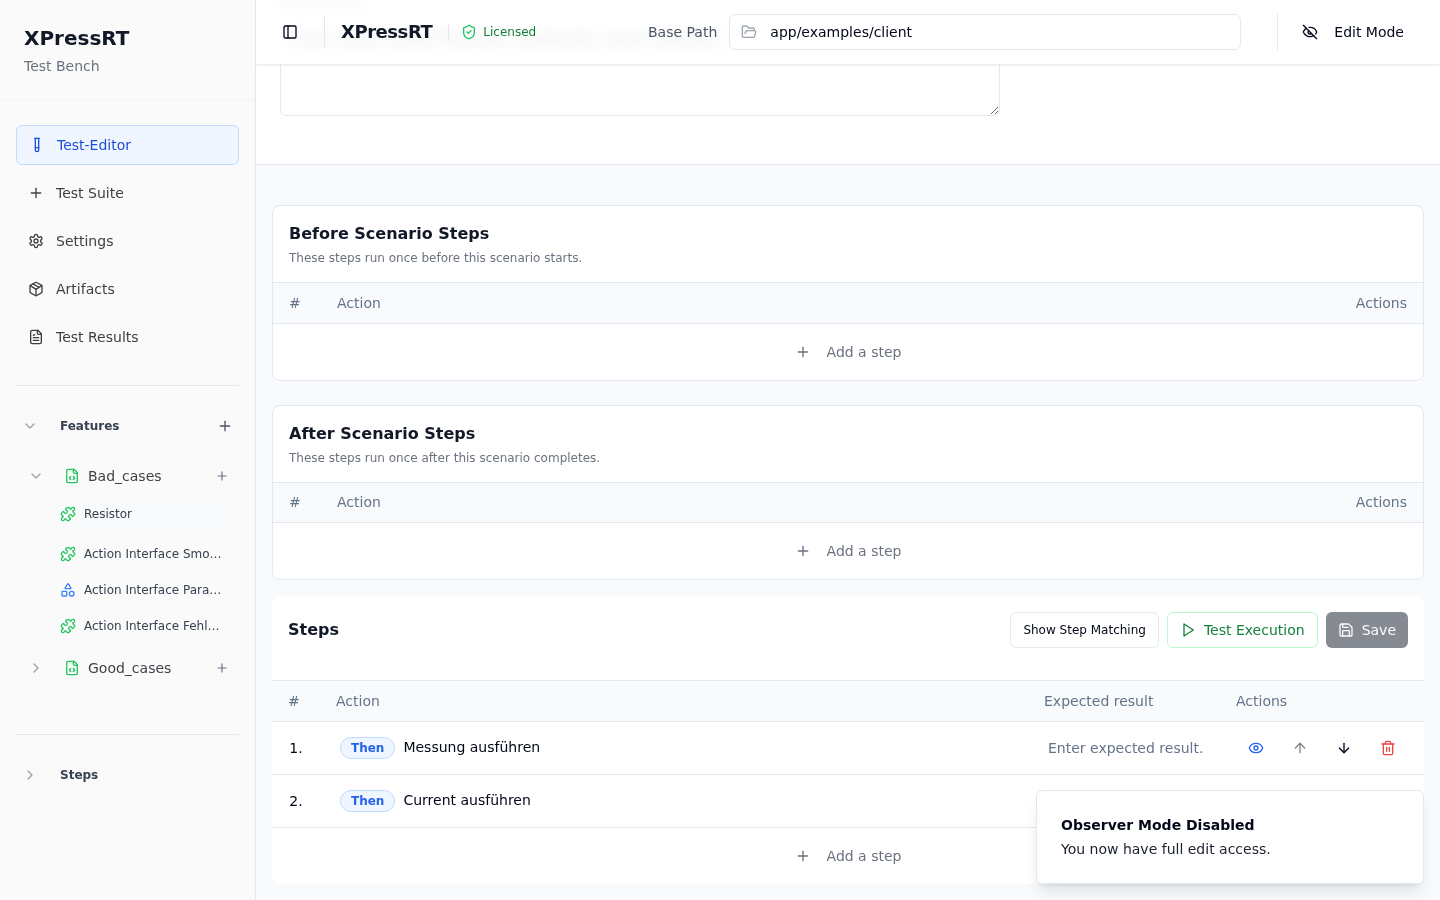
| Column | Description |
|---|---|
| # | Sequential step number |
| Action | The step keyword (Given, When, Then, And, But) followed by the step text. Parameters in Scenario Outlines are highlighted as <token>. |
| Expected result | Optional free-text field documenting what the step should produce (informational only) |
| Actions | Per-row buttons: View Step Definition (👁), Move Up (↑), Move Down (↓), Delete (🗑) |
Adding a Step
Click + Add a step at the bottom of the table. A new row appears with an editable text field. Type the step keyword followed by the step text (e.g. Given the power supply is on). XPressRT provides autocomplete suggestions from the registered step library.
Reordering Steps
Use the ↑ and ↓ buttons in the Actions column to move a step up or down in the sequence.
Saving Changes
Click the Save button (top-right of the Steps section) to persist all changes to the .feature file on disk. Unsaved changes are indicated by a modified state in the Save button.
Scenario Outline — Parameter Values
When a scenario is of type Scenario Outline, a Parameter Values section appears below the steps table.
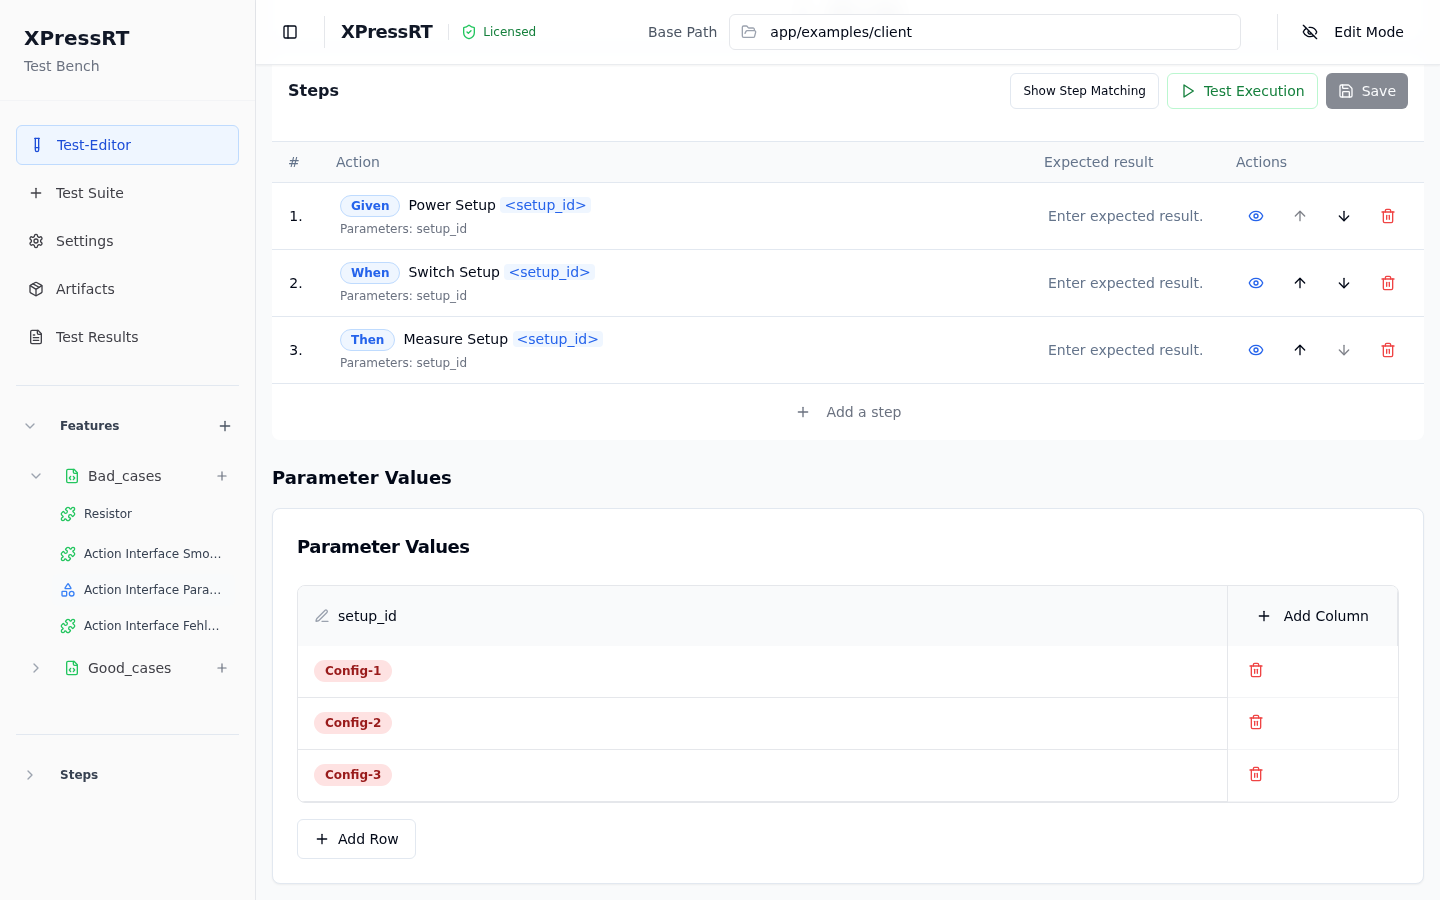
The table has:
- Columns — each column represents one parameter token (matching
<token>in the step text) - Rows — each row is one execution of the scenario with those specific values
To manage the table:
- Add Column — creates a new parameter; update step text to include the matching
<token> - Add Row — adds a new data row (one more test iteration)
- Click any cell to edit its value
- Click 🗑 on a row to delete it
Step Matching
Click Show Step Matching above the steps table to see which step definitions in the library match each step in the current scenario. A coloured indicator next to each step shows:
- 🟢 Matched — a registered step definition was found
- 🟡 Ambiguous — more than one step definition could match
- 🔴 Unmatched — no step definition exists; the step will fail at runtime
Deleting a Scenario
Switch to Edit Mode and click the red Delete Scenario button in the top-right corner of the editor. Confirm the deletion in the dialog that appears. This action removes the scenario from the .feature file permanently.